GitHub workflow for single clone
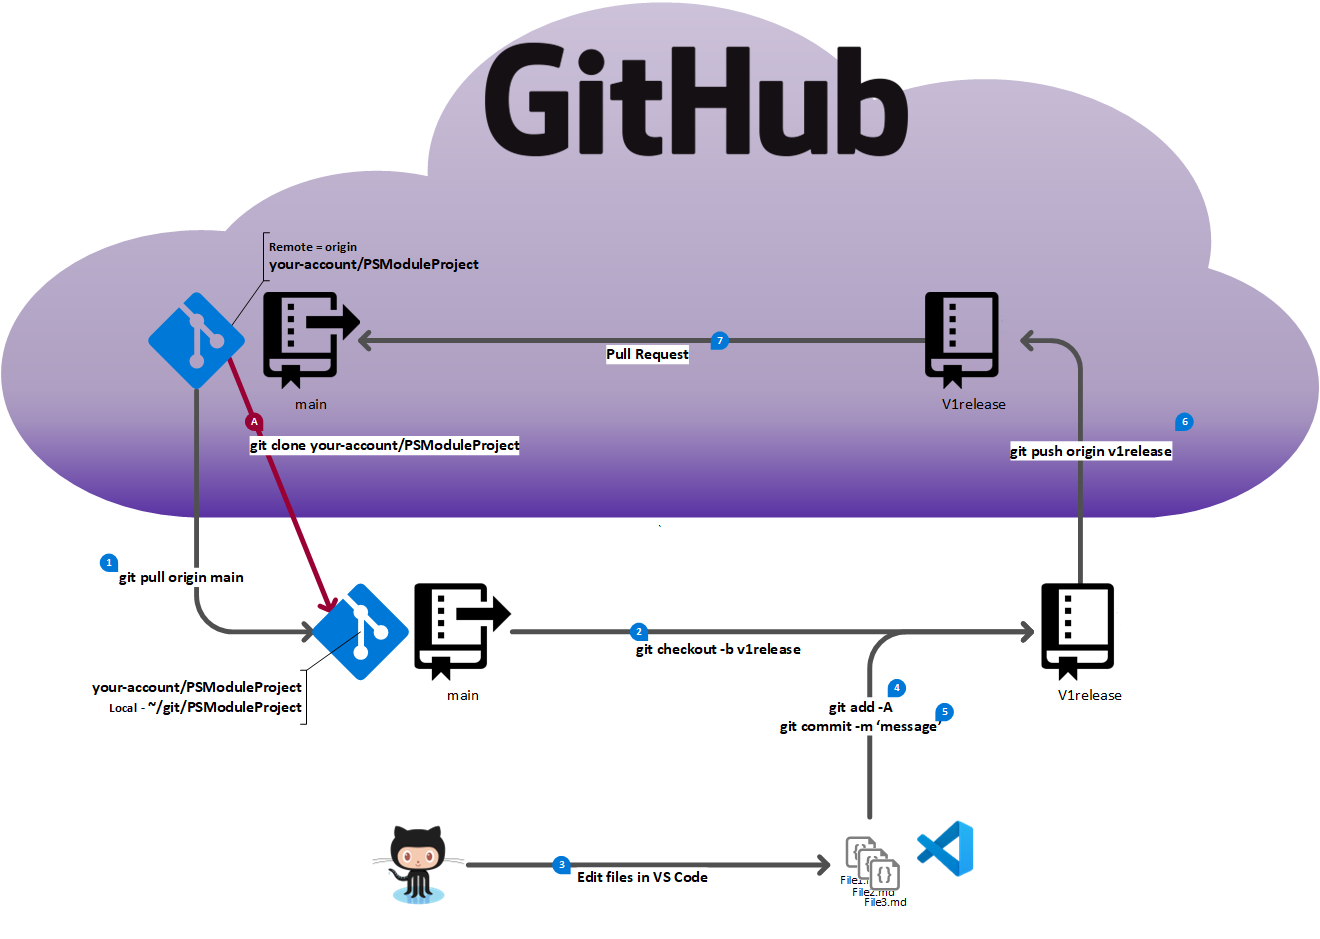
The following image illustrates the workflow for using Git and GitHub to add or change content using a working branch for a single repository. The step shown in red is a one-time action for each machine you work on. The numbered steps (in black) are described in the table below.
| Steps | Description of steps | Git command / GitHub actions |
|---|---|---|
| A | Clone the repo (once per machine) | git clone https://github.com/<your-account>/PSModuleProject |
| 0 | Checkout the main branch | git checkout main |
| 1 | Sync the main branch | git pull origin main |
| 2 | Create a new working branch | git checkout -b v1release |
| 3 | Create new content | Use VS Code to create or edit files |
| 4 | Add changes for Git tracking | git add -A |
| 5 | Commit changes to local repo | git commit -m 'commit message' |
| 6 | Push working branch to origin | git push origin v1release |
| 7 | Submit pull request | Go to https://github.com/<your-account>/PSModuleProject/pulls and click the New pull request button. Base repository: your-account/PSModuleProject base: main <– head repository: your-account/PSModuleProject compare: v1release Fill out the pull request description and click Submit. |
| 8 | PR is reviewed | Make the necessary changes based on the review feedback. |
| 9 | PR is merged | Go to step 10 |
| 10 | Cleanup unneeded branch info | git checkout maingit push origin --delete v1releasegit branch -D v1releaseThe git push command deletes the branch in your fork and deletes the tracking branch from your local repo. The git branch command delete the branch from your local repo. |
| 11 | Start new post | Go to step 0 |